
Once you have WordPress installed, it’s time to do a little bit of housekeeping with these 5 essential configuration steps for WordPress ministry websites. There are some basic WordPress settings you’ll want to configure to get the most out of your website from launch. Some of these things go a long way towards boosting your SEO early on, some will help your website security, and some just help ensure everything behaves in a way that makes the most sense.

Head to your new WordPress installation and let’s get started. If you haven’t already got a WordPress website installed, check out this guide on how to get one setup.
Logging in
First up, before you can do anything, you’ll need to log into your WordPress dashboard. This will typically be your domain name followed by /wp-admin – for example, examplewebsite.com/wp-admin
Once there, log in using your username and password. If you followed our setup guide, you should have received an email with the login URL, username and password in it. This will take you to your dashboard which should look something like this:
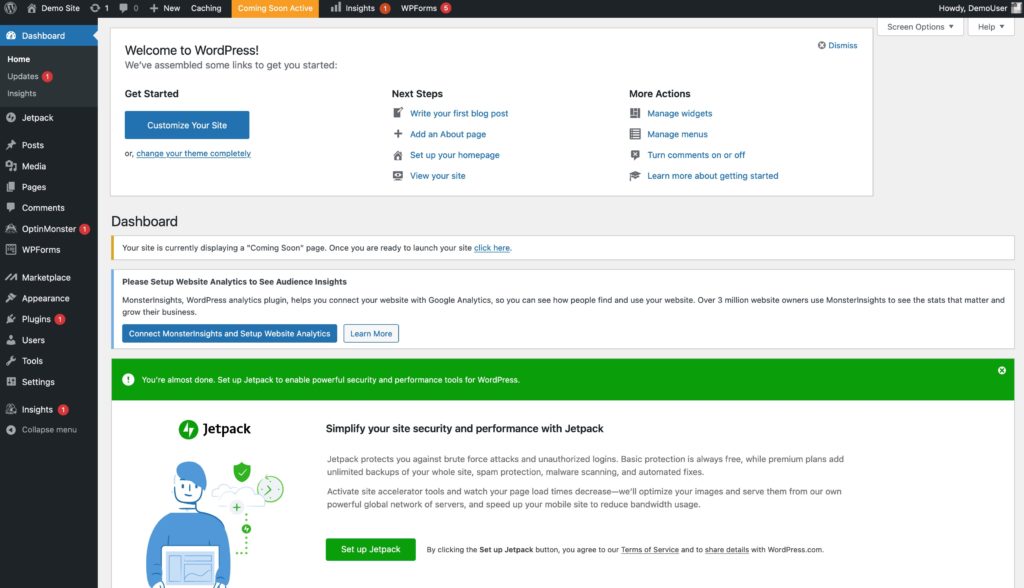
You might notice a whole bunch of overwhelming notices and advertisements. We’re going to get rid of a lot of this clutter in this guide. Once we’re done, it will be much cleaner and hopefully less overwhelming. So let’s get into our essential WordPress configuration steps.
1. Remove pre-installed plugins
WordPress comes with a couple of pre-installed plugins, and the QuickInstall tool we used in our HostGator WordPress setup guide adds some more plugins too. Before we do anything else, I recommend cleaning these up so that we get rid of all those ugly notices clogging up the top of every page on our dashboard. The exact plugins that have been pre-installed for you might be different to what I’ve listed in this guide. Have a read of their titles and descriptions to see if they are something you might want to use. As a general rule of thumb, you shouldn’t have any plugins installed that you aren’t using and if you can solve a problem without a plugin, that is the better option.
If you follow our non-profit faith-based ministry guides we’ll walk you through each of the plugins we recommend using for specific purposes in later guides.
Right now though, let’s tidy up those pre-installed plugins.
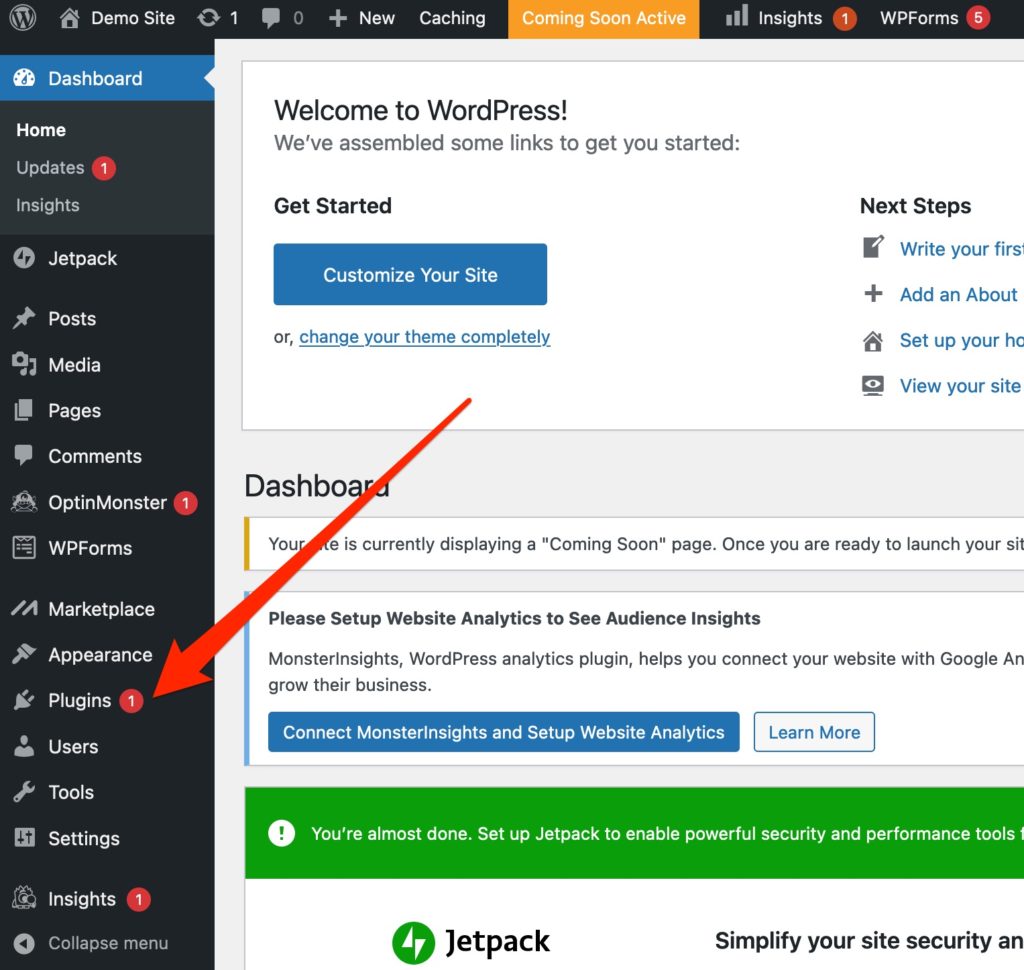
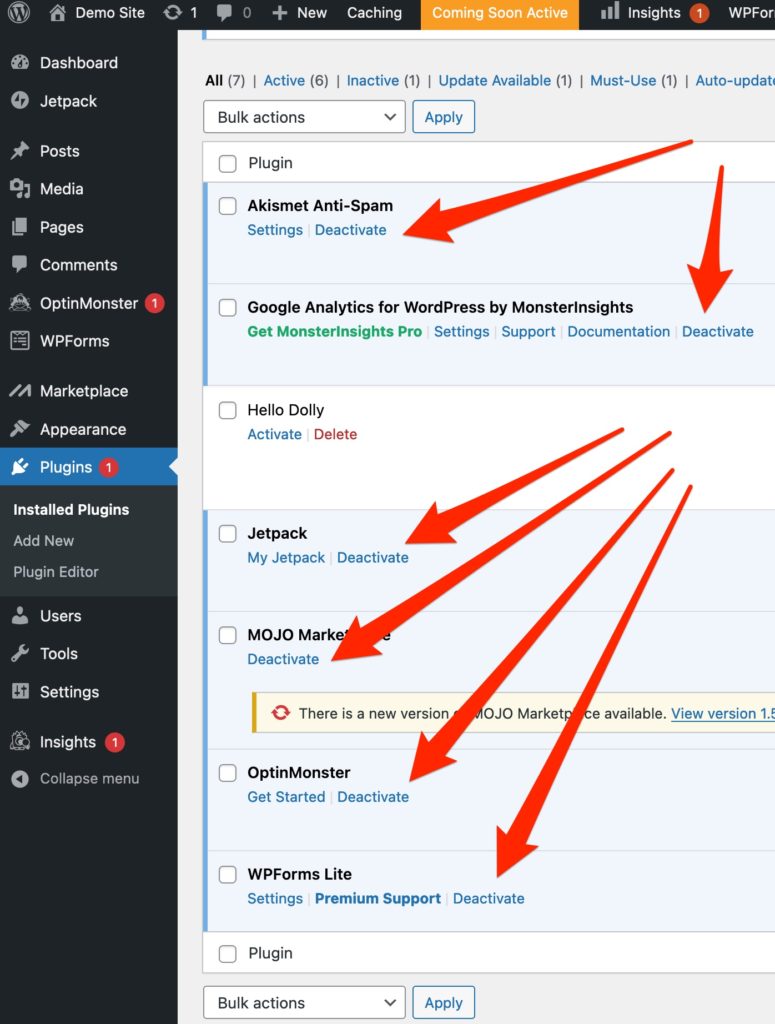
In the left menu of the WordPress dashboard, click on the “Plugins” menu item.
We want to deactivate all the plugins on this page for now and delete most of them as well.
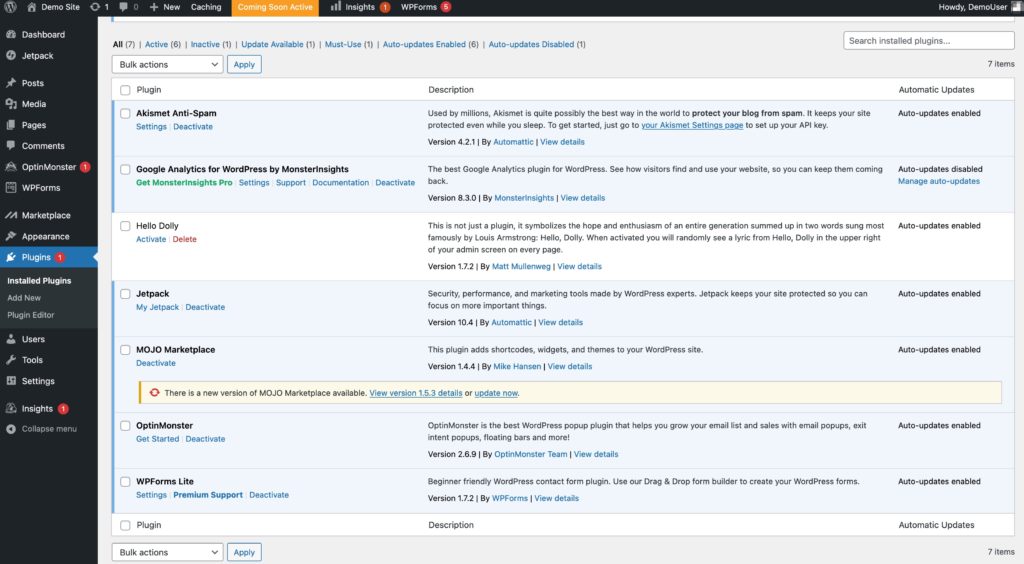
You can tell if a plugin is active or not by the background colour. If it is white, it is inactive. If it is blue, it is active.
To deactivate a plugin click the “Deactivate” link below the plugin name.
Once it has been deactivated you can then delete it by clicking the red “Delete” link that will appear below the title.
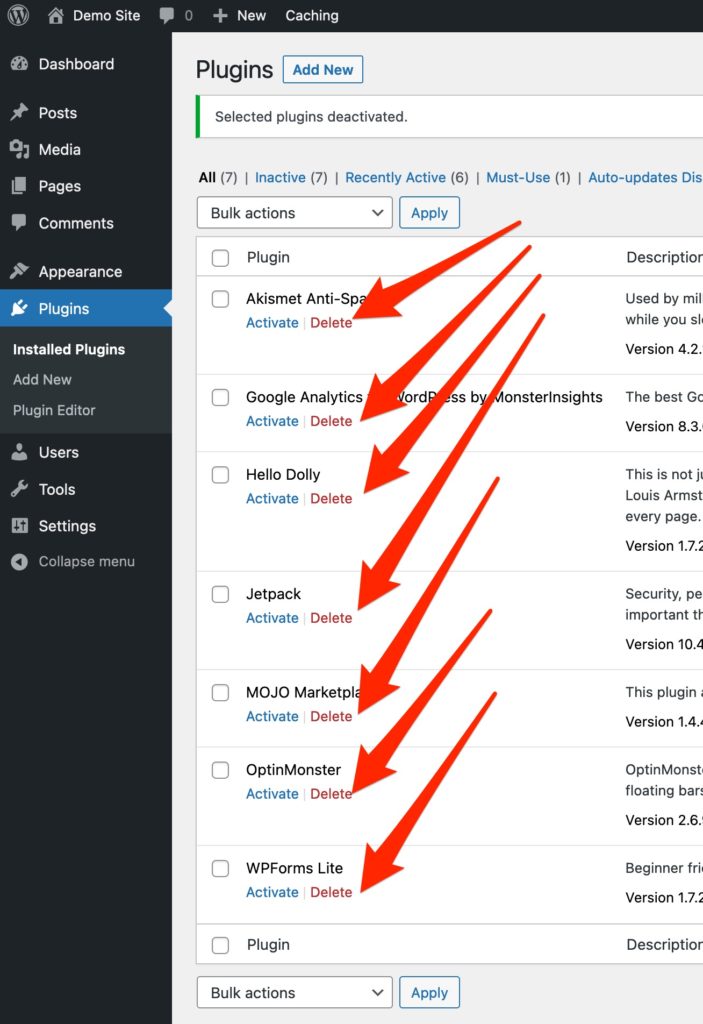
Plugins must be deactivated before they can be deleted.
I recommend deactivating and deleting all the pre-installed plugins, including:
- Akismet Anti-Spam
- Google Analytics for WordPress by MonsterInsights
- Hello Dolly
- Jetpack by WordPress.com
- MOJO Marketplace
- OptinMonster
- WPForms Lite
There are some great plugins here that you may re-install in the future (eg Akismet and Jetpack) if they meet your needs, however, for most non-profit faith-based ministry websites I believe there are better options. Some of these options will be covered in our later guides.
2. Customise your user profile
Move your cursor to the “Users” menu item in the left menu. From the sub-menu that pops up, click on the “Profile” option.
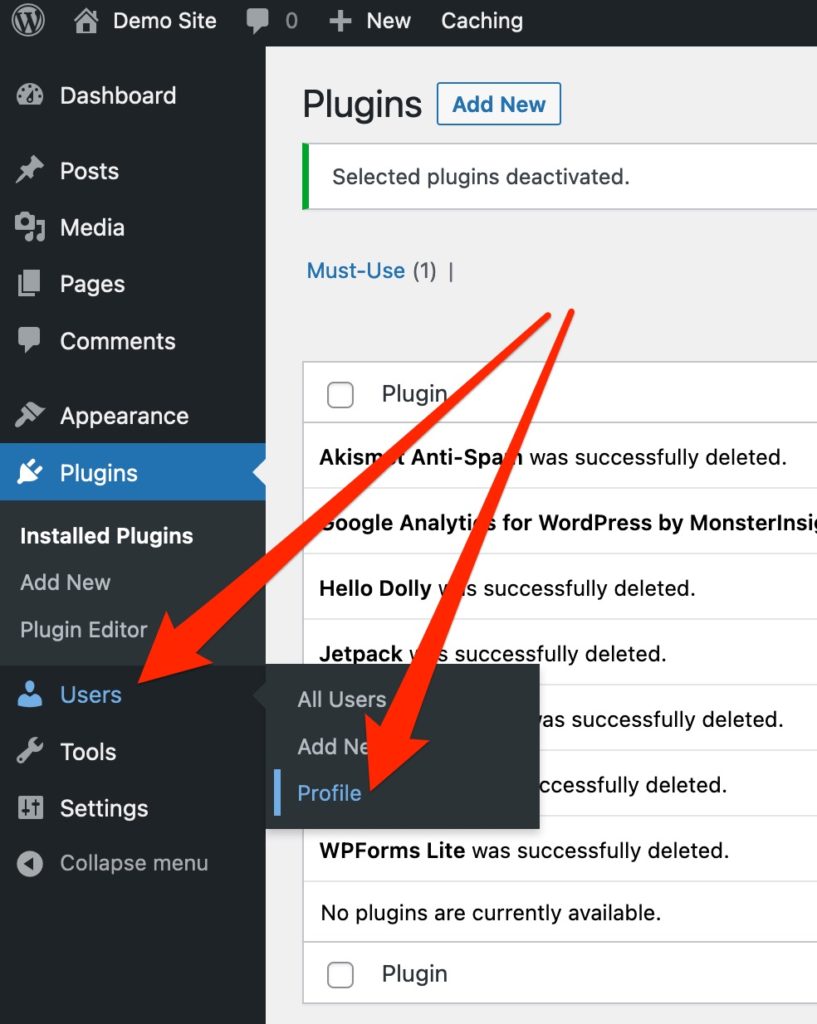
You will be taken to the profile screen where you can customise all your profile settings such as dashboard colour scheme, name settings, password and so on.
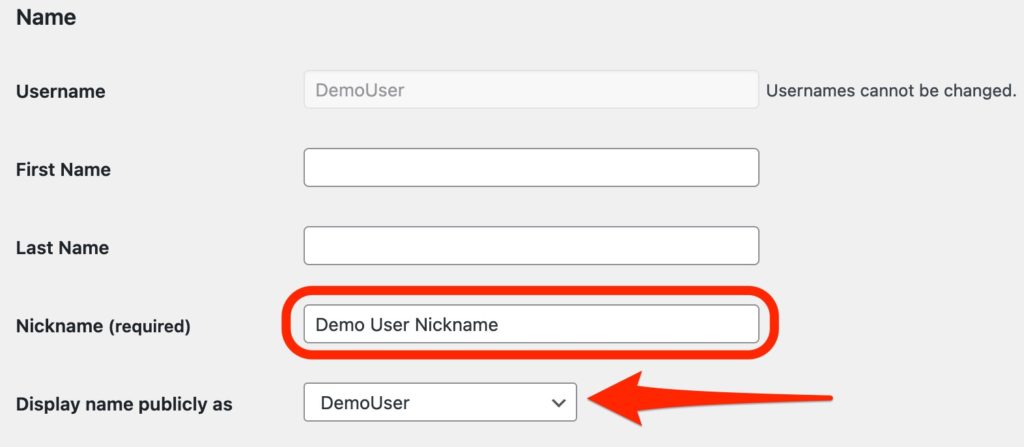
I suggest updating the nickname to how you would like your name to appear publicly. Do this by scrolling to the “Name” section and editing the “Nickname” field and then selecting your nickname from the “Display name publicly as” dropdown.
Your profile picture is configured on gravatar.com by default. It’s possible to change this to allow configuration directly in WordPress but that is beyond the scope of this article.
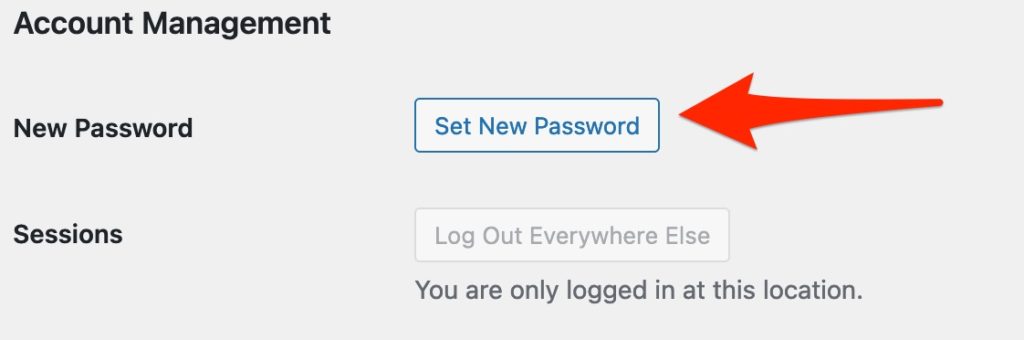
The other thing I’d consider doing while on your user profile is setting a new password. You can set your own password or let WordPress generate a strong one for you. I recommend using a strong, secure password. To do this, scroll to the “Account Management” section and click the “Set New Password” button.
It will pre-fill with a strong password. Save this, or edit it to be a password of your choosing.
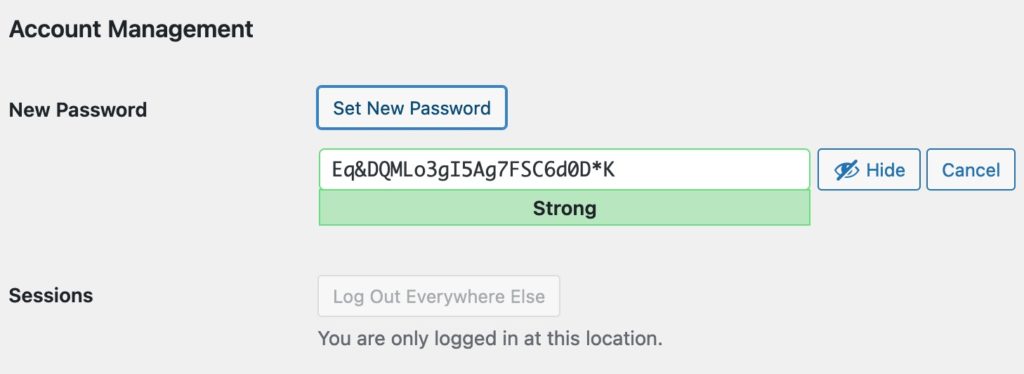
If you choose your own password, please make sure it has both upper and lower case letters, numbers and symbols. You want to do everything you can to avoid your site being hacked so having a strong admin password is key to that. Please don’t set an easy password.
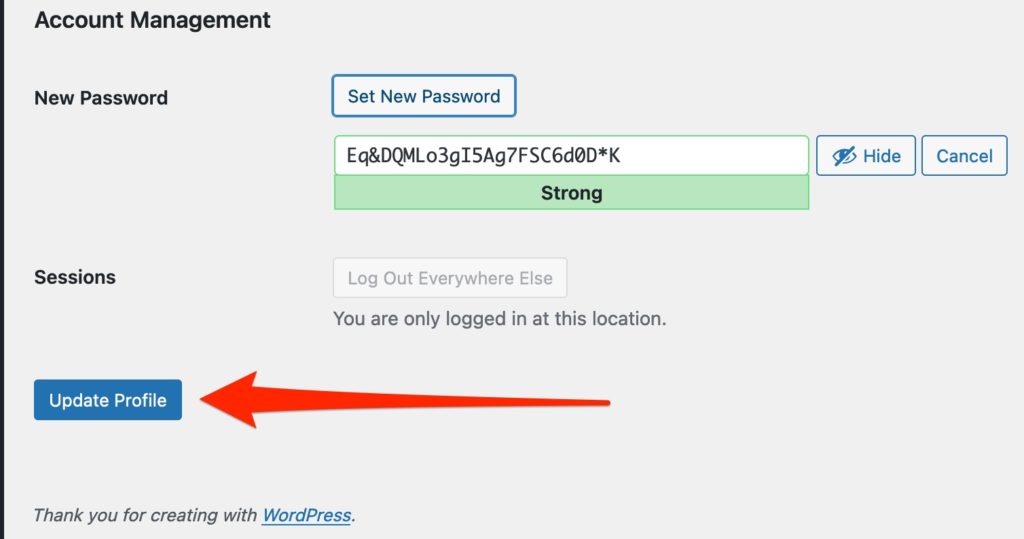
Once you are finished, click the “Update Profile” button at the bottom of this screen to save your changes.
3. Set your website timezone
WordPress displays all date and time information based on the website’s geographical location. This means that you’ll see dates formatted according to the country or city that is set as the website timezone. By default, this is set as UTC+0, so unless you are in the United Kingdom or a handful of other countries, you’ll want to change this to ensure that your times not only display correctly but that time-based operations, like scheduled posts, work as expected.
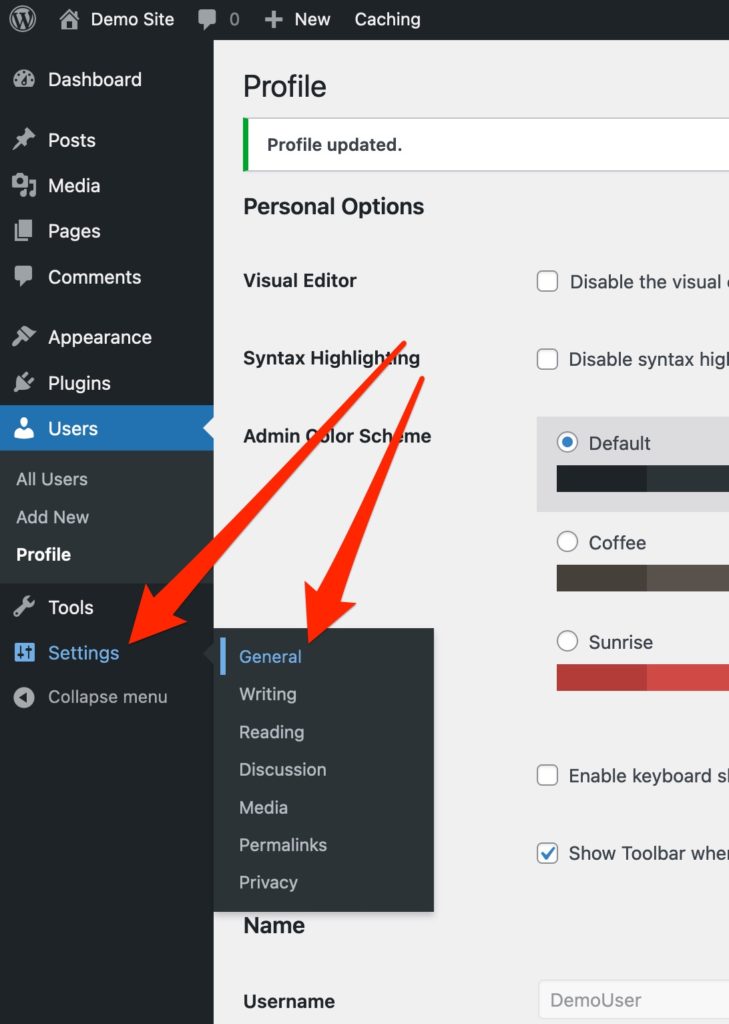
The quickest way to set your timezone is by navigating to your “General” configuration options in WordPress. In the left menu, hover over the “Settings” item and choose “General” from the sub-menu that appears.
Scroll down the “General Settings” page until you find the “Timezone” setting. From the dropdown, select your timezone. I recommend choosing a city that is in your timezone rather than a manual offset (you will need to scroll up to find the region/city options). This ensures that any daylight saving time changes are automatically applied on your site and can also help avoid some issues with certain plugins that require geolocation-based time.

WordPress will automatically update all dates and times to match your website’s timezone once you save these settings. To do so, scroll to the bottom of this page and click the “Save Changes” button.
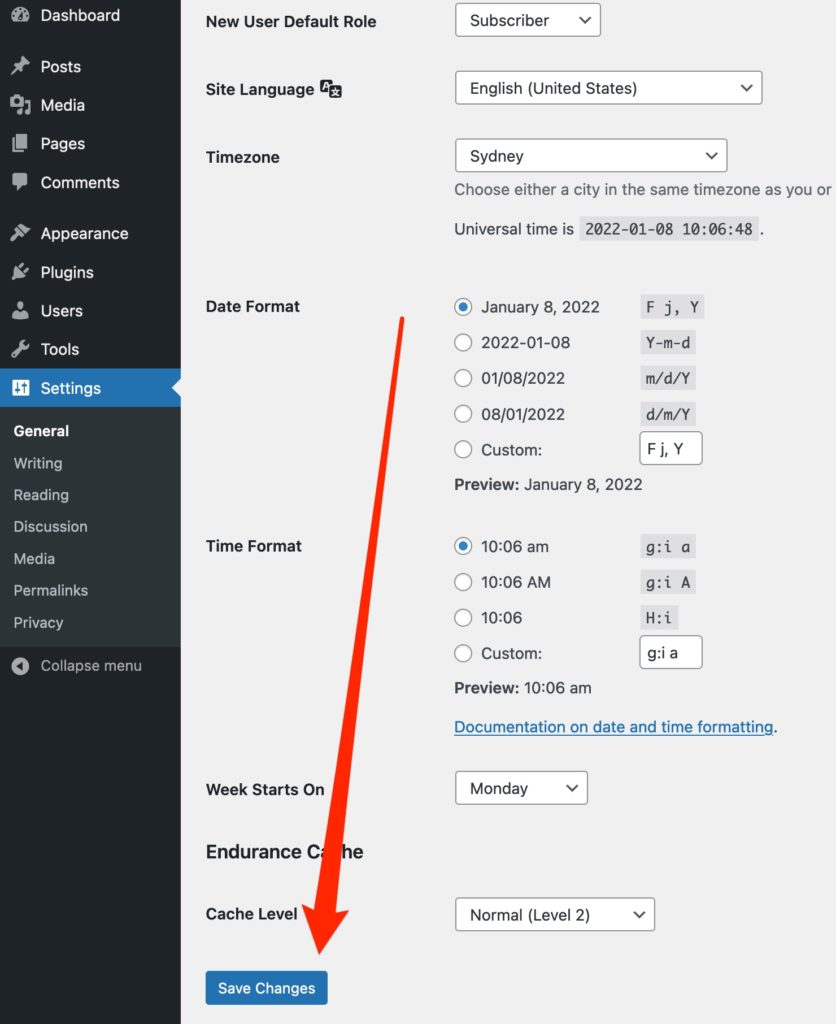
4. Set your permalink format
WordPress allows you to customise all kinds of URL formats on your site – URL’s are the full link to a particular page or post. So what we are customising here is what comes after the .com part of your domain name, eg www.mydomain.com/this-is-the-bit-we-are-customising/
The default permalink format for posts is not very human-readable and isn’t great for SEO either. I recommend using the “Post Name” option as this creates an easily readable URL using the title of your page or post. To set this, navigate to the “Permalinks” configuration screen in WordPress. In the left menu, hover over the “Settings” item and choose “Permalinks” from the sub-menu that appears.
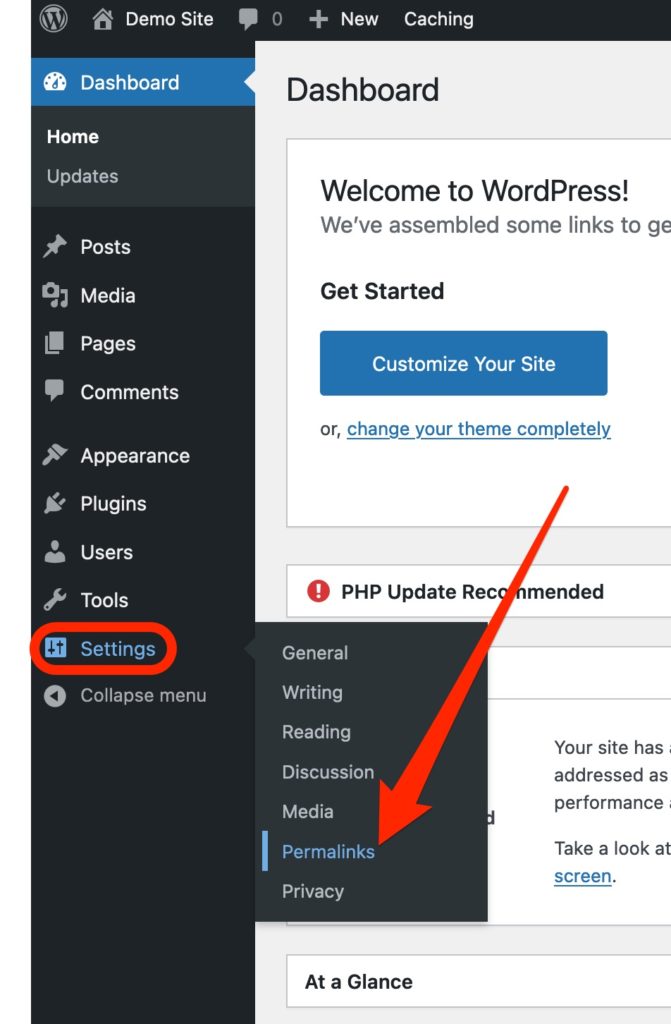
You will be taken to a page with six different permalink formats to choose from. Select the one labelled “Post name” then scroll to the bottom of the page and click “Save Changes”.
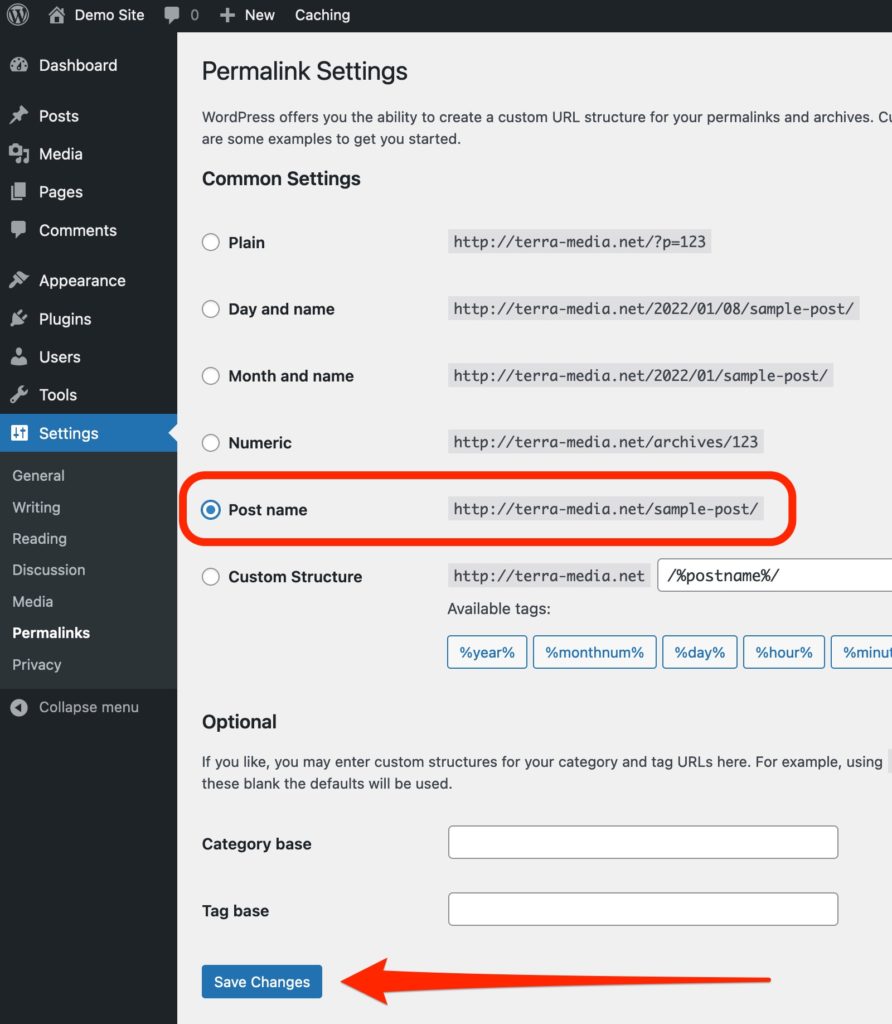
5. Configure WordPress to use SSL
SSL is how we ensure communications between your website and the user’s computer are secure. It enables the little padlock and changes the URL from starting with http:// to https:// which is extremely important if you are accepting donations or selling things on your website. Using https:// is also important for your SEO as Google has put a big emphasis on ensuring websites are secure.
This is not a hard change to make but there is a little bit of code adjustment required. Don’t let this put you off. Once you are done that’s it for our essential WordPress configuration steps and you are onto learning how to use WordPress.
If you aren’t comfortable with making this change, you can also use a plugin called Really Simple SSL. This plugin does the configuration for you without needing code. However, it is adding a plugin that you don’t really need to use and it has become pretty heavy on promoting their paid upgrades.
To make this change, we first need to tell WordPress what our new website address will be. We need to go back to our General Settings by hovering over “Settings” in the WordPress menu and selecting “General” from the sub-menu that appears.
Change both the “WordPress Address (URL)” and the “Site Address (URL)” to start with https:// instead of http:// – double-check that the URL is correct before you save this to avoid headaches. So if the original URL was http://ministrylaunchpad.com it should now look like https://ministrylaunchpad.org
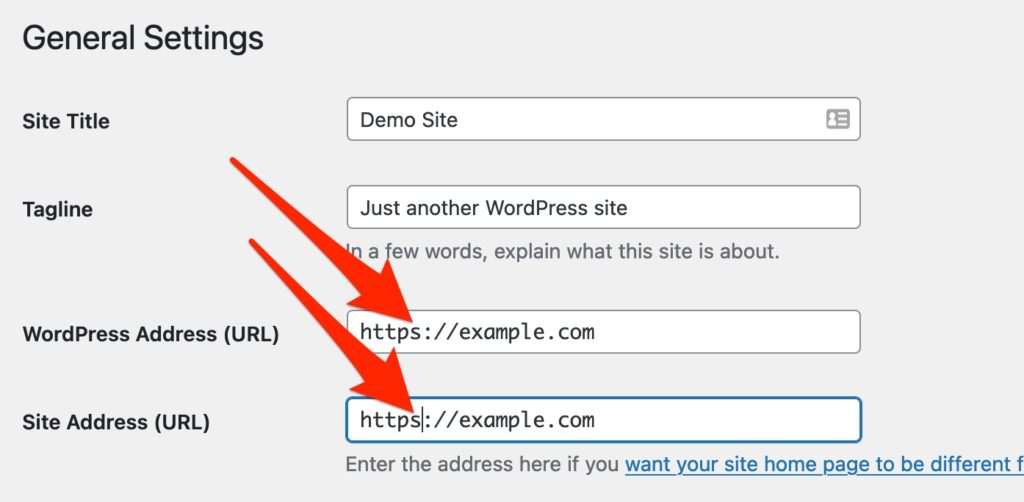
Scroll to the bottom of the page and click “Save Changes”. You will most likely be logged out of the website and need to log back in.
You should now be able to access your website at https:// instead of http:// however to ensure that everything is using SSL we need to update a file on the server called .htaccess and this is the part that may be a little daunting.
To do this, go back to your hosting Control Panel. For this guide, we are using HostGator. You should have the URL for your Control Panel in the email you received from HostGator when you signed up.
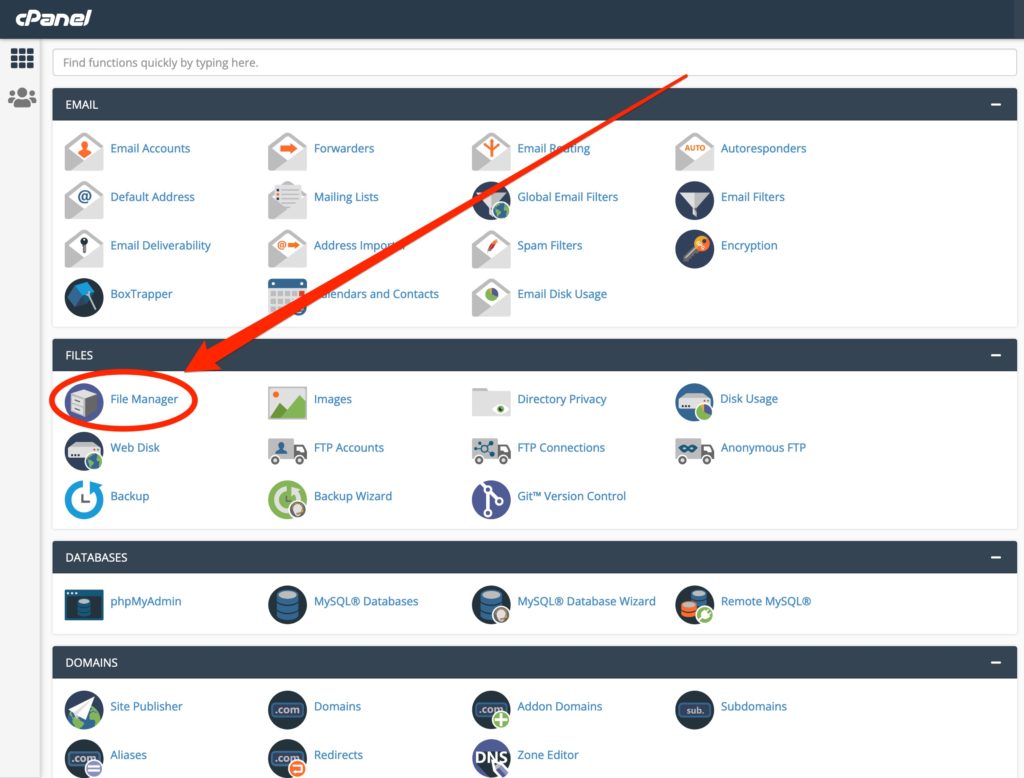
Once logged in, scroll to the “Files” section and click the “File Manager” icon.
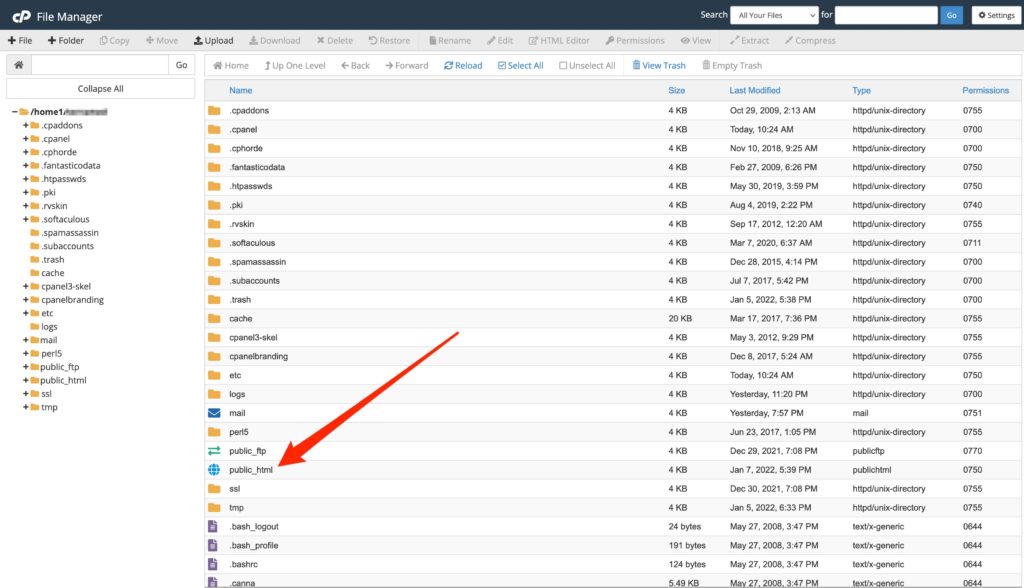
A new window or tab will open that looks a bit like a folder navigation structure on your local computer. Open the folder called “public_html” by double-clicking on it.
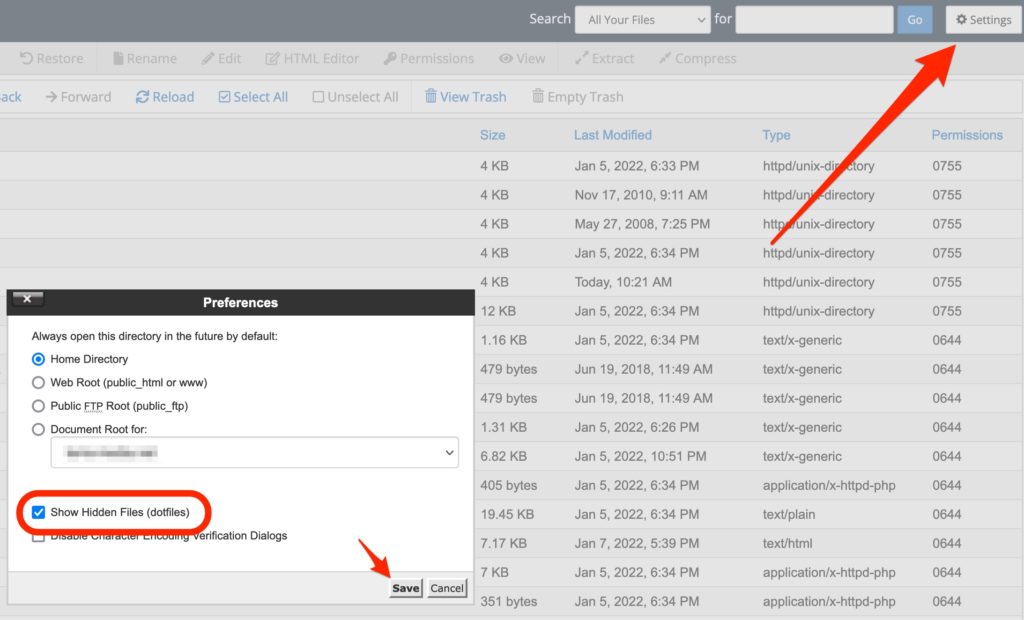
We want to edit a hidden file called “.htaccess”. This file should be located in your public_html folder. If you can’t see it, hidden files might not be set to show. To show hidden files click on the “Settings” button in the top right of the screen. Tick the box called “Show Hidden Files” and then click the “Save” button. You should now be able to see hidden files including the .htaccess file.
To edit your .htaccess file, click on it once to select it and then click the “Edit” button near the top of the screen. A popup dialogue will appear warning you that you are about to edit a file and confirming the encoding options. Click the “Edit” button at the bottom of this popup.

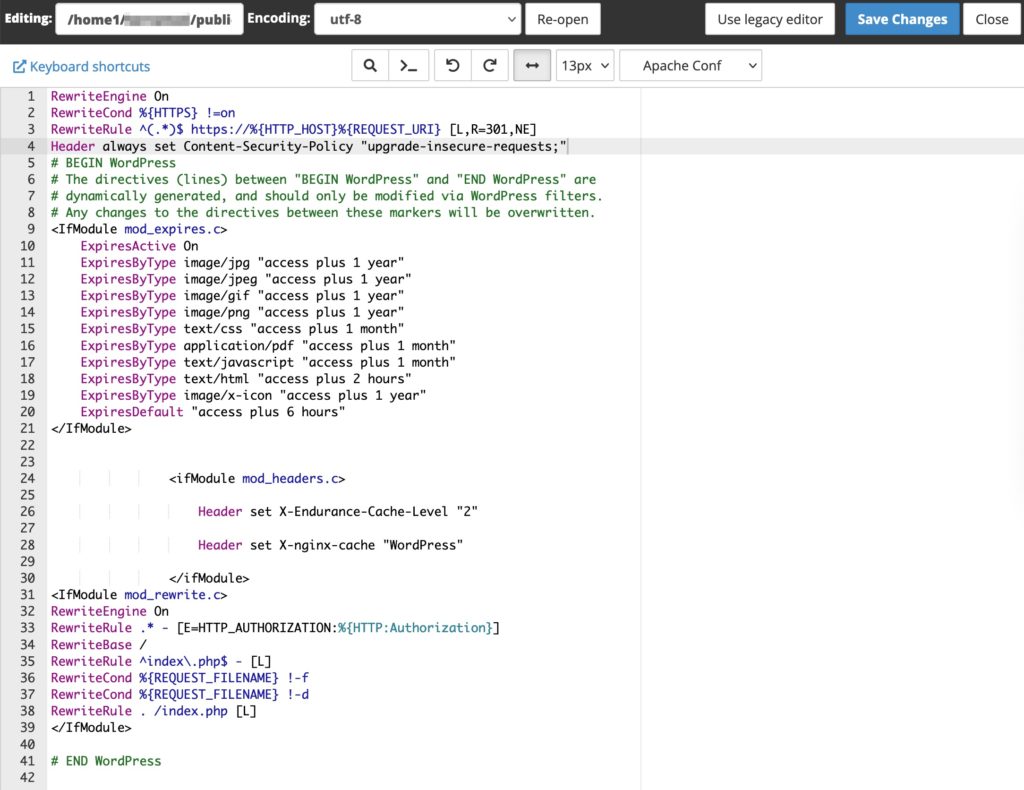
A text editor will appear with a bunch of commands in it. It should look something like this:
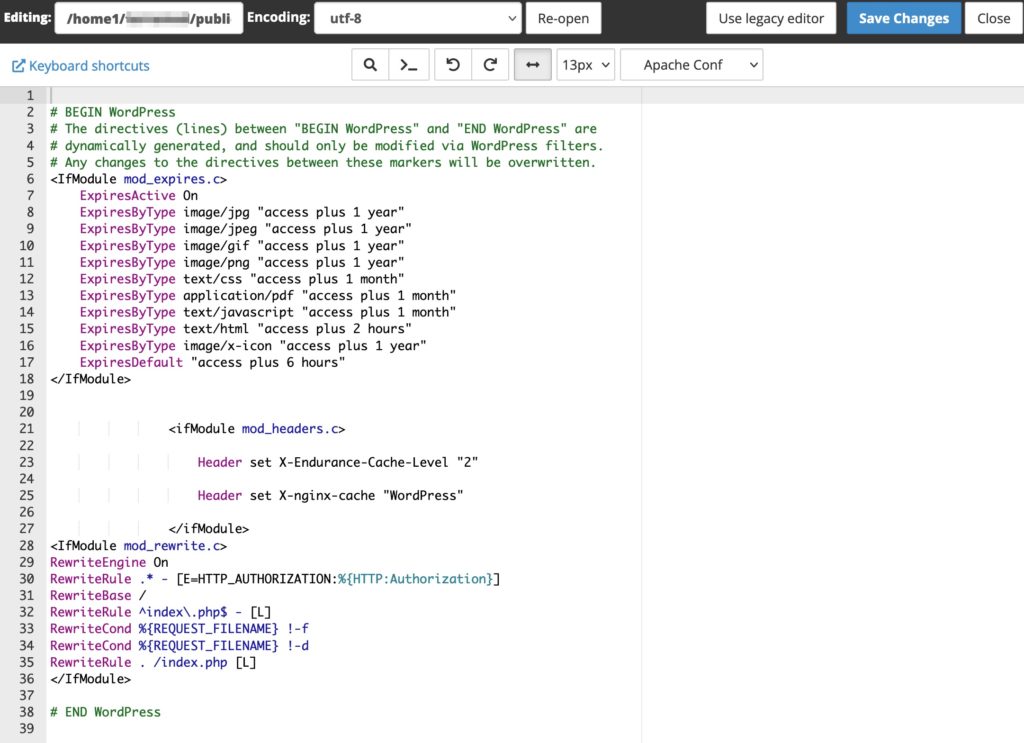
We want to add some more commands to the top of this file. Click at the start of the first line in the text editor and create a new blank line. On this blank line paste in the following commands:
RewriteEngine On
RewriteCond %{HTTPS} !=on
RewriteRule ^(.*)$ https://%{HTTP_HOST}%{REQUEST_URI} [L,R=301,NE]
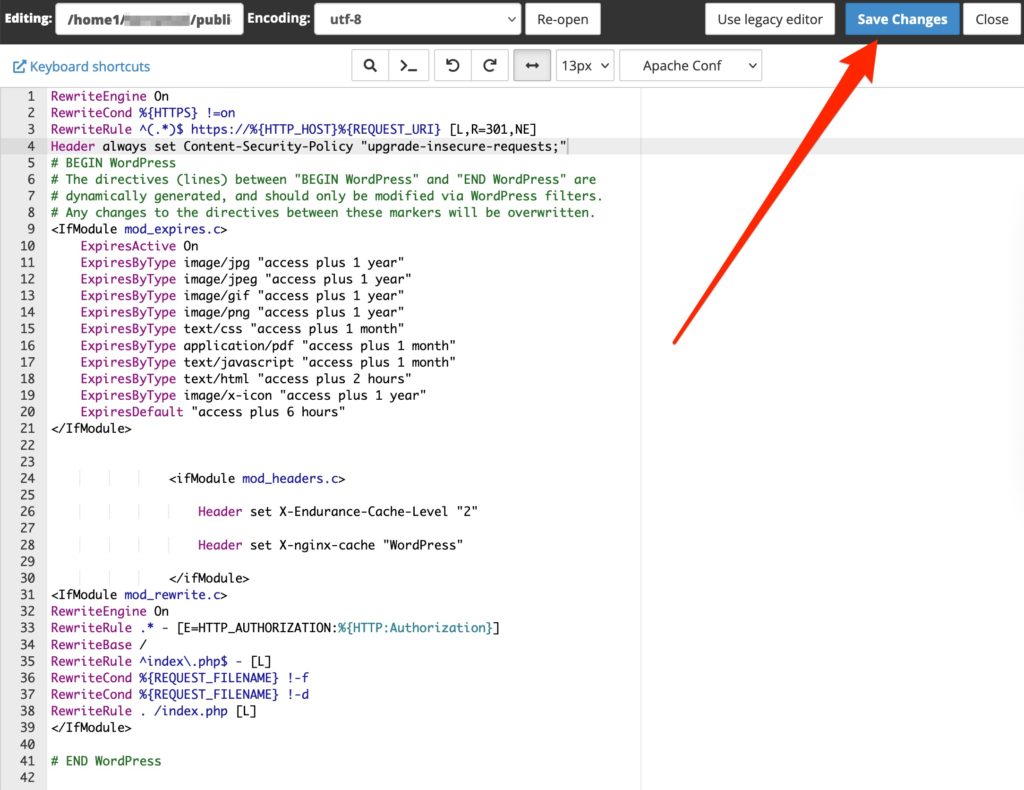
Header always set Content-Security-Policy "upgrade-insecure-requests;"It should now look like this:
Make sure to save your updated .htaccess file by clicking the “Save Changes” button in the top right of the screen.
That wasn’t too daunting now, was it?
These commands will help to ensure that everything on your website uses HTTPS.
That’s it!
Now that we are done setting up our essential configuration items it’s time to move on to learning how to use WordPress, the basics of designing your new ministry website and adding your content! The next article in this series will cover the basic concepts of WordPress to help you learn what key terms mean as we will be using them onwards throughout this guide and you will come across them throughout the world of WordPress.
I hope you found this guide helpful. I’m always open to feedback and suggestions so feel free to leave a comment or question below!